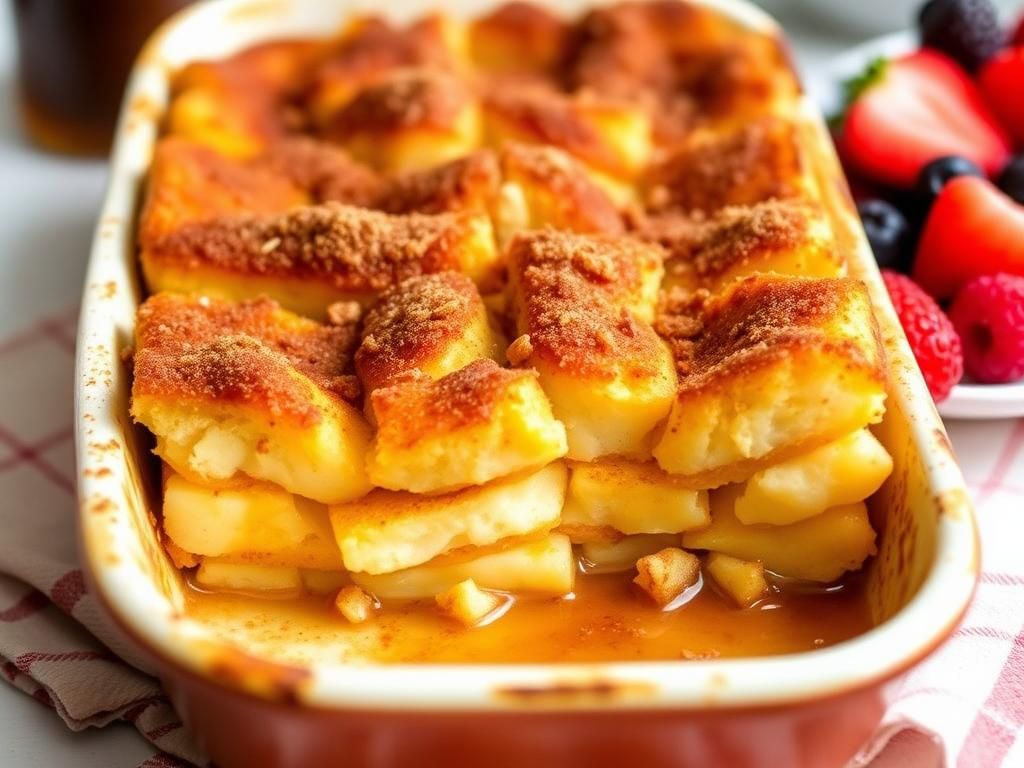
Are you craving a truly exceptional Apple Dessert, one where the topping is just as celebrated as the fruit, if not more? Imagine warm, tender, cinnamon-kissed apples nestled under a gloriously thick, buttery, and perfectly crisp Oat Topping, all baked to perfection on a simple sheet pan. This isn't just any apple crumble; this is the Crumble Lover's Sheet-Pan Apple Crumble. We’ll walk you through crafting this easy yet impressive dessert, sharing all the secrets to an abundant, irresistible oat topping and mastering the art of Sheet Pan Baking for the ultimate crumble experience. Get ready to discover your new favorite fall treat!
Table of Contents
- Why a Sheet-Pan Apple Crumble is Every Crumble Lover's Dream
- Mastering the Perfect Oat Topping: The Heart of Your Crumble
- Selecting and Preparing Apples for Your Sheet-Pan Masterpiece
- Step-by-Step Guide: Assembling Your Crumble Lover's Sheet-Pan Apple Crumble
- Tips and Tricks for Sheet Pan Baking Success
- Beyond the Basics: Customizing Your Sheet-Pan Apple Crumble
- Storing and Reheating Your Apple Dessert Delight
- Frequently Asked Questions about 1
- Your Ultimate Apple Crumble Adventure Awaits
Why a Sheet-Pan Apple Crumble is Every Crumble Lover's Dream
For those of us who believe the crumble topping is the star of any fruit crisp or crumble, the traditional deep-dish format can sometimes feel… limiting. Enter the Crumble Lover's Sheet-Pan Apple Crumble, a game-changer for Apple Dessert aficionados. This method isn't just a novelty; it's a strategic move for maximum deliciousness.
The Magic of Sheet Pan Baking for Desserts
Sheet Pan Baking has revolutionized weeknight dinners, and its magic extends beautifully to desserts like our apple crumble. Baking on a large, flat surface means more even heat distribution, leading to perfectly cooked apples and a consistently golden-brown Oat Topping. Plus, cleanup is often simpler, especially if you use parchment paper!
The larger surface area of a sheet pan allows the fruit to spread out, which means it cooks faster and more evenly. This also prevents the apples from steaming too much, which can sometimes lead to a soggier result in deeper dishes. For a truly magnificent Apple Dessert, the sheet pan method is a revelation.
More Crumble, More Joy: The Sheet Pan Advantage
Here’s the real secret for us crumble enthusiasts: a sheet pan offers a significantly larger surface area compared to a standard baking dish. What does this mean? More topping! You get a higher ratio of glorious, crispy, buttery oat crumble to tender apple in every single bite.
No more excavating through fruit to find those coveted crunchy bits. With a Crumble Lover's Sheet-Pan Apple Crumble, every serving is generously endowed with that incredible texture and flavor. It’s a simple equation: more surface area equals more crumble, and more crumble equals more joy.
An Apple Dessert for All Seasons (and Skill Levels)
While apple crumble often screams "autumn," this easy Sheet Pan Baking recipe is delightful any time of year. It’s incredibly straightforward, making it perfect for novice bakers, yet the results are impressive enough for seasoned cooks.
Whether you're looking for a comforting weeknight treat, a potluck showstopper, or an easy dessert for a crowd, this Crumble Lover's Sheet-Pan Apple Crumble delivers. Its rustic charm and irresistible aroma make it a universally loved Apple Dessert.
Mastering the Perfect Oat Topping: The Heart of Your Crumble
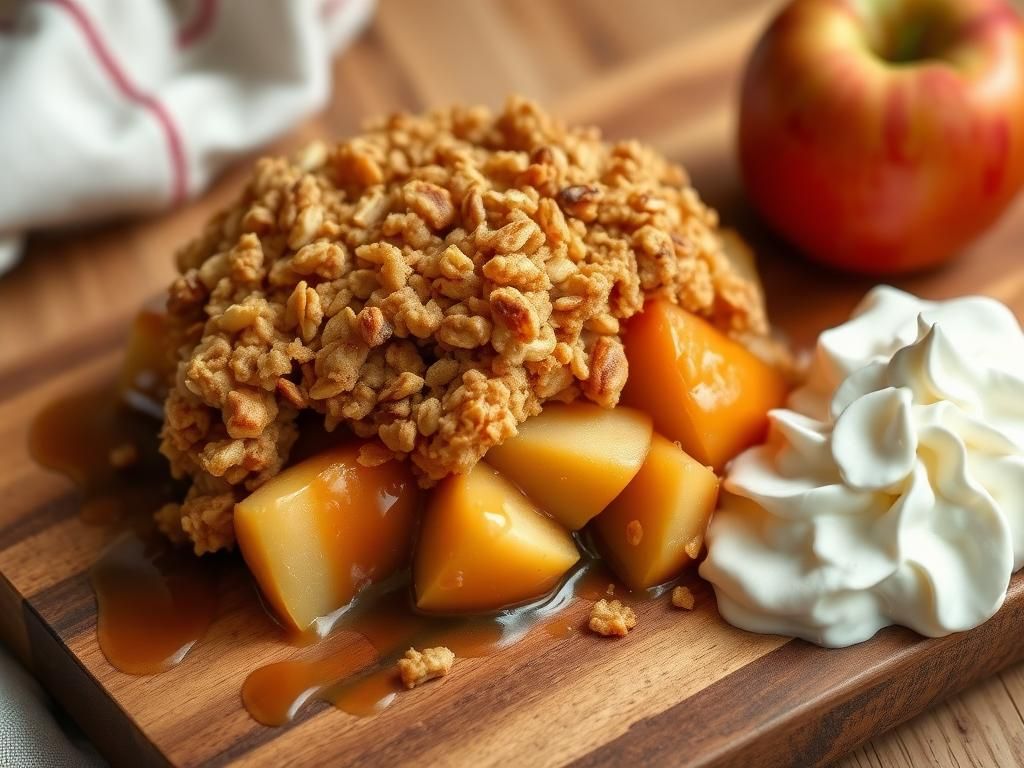
The soul of any great apple crumble lies in its topping. For the Crumble Lover's Sheet-Pan Apple Crumble, we’re not just aiming for good; we’re aiming for an Oat Topping that’s utterly transcendent – crispy, buttery, and generously portioned.
Choosing Your Oats: Rolled vs. Quick-Cooking
The type of oats you choose significantly impacts the texture of your Oat Topping. For the best chew and structure, rolled oats (old-fashioned oats) are highly recommended. They maintain their shape during baking, providing a lovely, rustic texture.
Quick-cooking oats can be used in a pinch, but they tend to absorb more moisture and can result in a softer, less distinct crumble. Steel-cut oats are not suitable for this type of topping as they require much longer cooking times and more liquid. Trust us, rolled oats are your best friend for a superior crumble.
The Right Fat: Butter is Best (and How to Cut it In)
There’s no substitute for real butter when it comes to flavor and texture in an Oat Topping. Use cold, unsalted butter, cut into small cubes. The cold temperature is crucial; as the cold butter pieces melt in the oven, they create steam, which results in a lighter, crispier crumble.
To "cut in" the butter, you can use a pastry blender, two knives, or even your fingertips. Work the butter into the dry ingredients (flour, sugar, oats, spices) until the mixture resembles coarse crumbs with some pea-sized pieces of butter still visible. Don't overmix; those little butter pockets are key to a tender, flaky topping.
Flour Power: All-Purpose vs. Alternatives
Standard all-purpose flour provides the structure for the Oat Topping, helping it bind together and achieve that perfect crumbly texture. It’s reliable and readily available.
If you’re looking for slight variations, you could substitute a portion of the all-purpose flour with whole wheat flour for a nuttier flavor or even almond flour for a gluten-free boost and richer taste. However, for a classic, foolproof crumble, all-purpose flour is the way to go.
Sweetness and Spice: Getting the Flavor Balance Just Right
A good Oat Topping needs a balanced sweetness and a warm spice profile. A combination of brown sugar and granulated sugar often yields the best results. Brown sugar adds moisture and a rich, molasses flavor, while granulated sugar contributes to crispness.
Classic spices like cinnamon and nutmeg are essential for that quintessential apple crumble aroma and taste. Don't be shy with the cinnamon! You can also add a pinch of allspice or cardamom for a more complex flavor profile if you're feeling adventurous.
Secret Ingredients for an Extra-Crispy Oat Topping (Optional)
Want to elevate your Oat Topping from great to absolutely legendary? Consider a few additions:
- Chopped Nuts: Pecans, walnuts, or almonds add fantastic crunch and nutty flavor. Toast them lightly before adding for even more depth.
- A Touch of Cornstarch: A tablespoon of cornstarch mixed with the dry ingredients can help absorb excess moisture and contribute to a crispier finish.
- Unsweetened Shredded Coconut: For a subtle tropical note and extra texture.
These additions can take your Crumble Lover's Sheet-Pan Apple Crumble to a new level of deliciousness.
Selecting and Preparing Apples for Your Sheet-Pan Masterpiece
The foundation of any great Apple Dessert is, of course, the apples themselves. Choosing the right varieties and preparing them properly will ensure your Crumble Lover's Sheet-Pan Apple Crumble has the perfect balance of sweetness, tartness, and texture.
Best Apple Varieties for Baking
Not all apples are created equal when it comes to baking. You want apples that hold their shape and offer a good flavor profile that complements the sweet Oat Topping. Some excellent choices include:
- Honeycrisp: Firm, crisp, and wonderfully sweet-tart.
- Granny Smith: The classic tart baking apple, holds its shape beautifully.
- Fuji: Sweet, crisp, and juicy; maintains good texture.
- Braeburn: Crisp, aromatic, with a complex sweet-tart flavor.
- Gala: Mildly sweet and crisp.
For the most interesting flavor, consider using a mix of two or three different varieties. For example, combining the tartness of Granny Smith with the sweetness of Honeycrisp or Fuji creates a wonderfully balanced filling. You can find excellent guides on apple varieties for baking from resources like the University of Illinois Extension's "Apples and More" page.
To Peel or Not To Peel? A Crumble Lover's Conundrum
This is largely a matter of personal preference. Leaving the peel on adds a bit of color, extra nutrients, and a slightly more rustic texture. It also saves you a bit of prep time!
However, some people prefer the smoother, more uniform texture of peeled apples in their Apple Dessert. If you choose to leave the peels on, make sure to wash the apples thoroughly. If using apples that are not organic, peeling might be a better option to reduce pesticide residue.
Slicing for Success: Uniformity is Key
How you slice your apples matters for even cooking. Aim for slices that are about 1/4 to 1/2 inch thick. If they're too thin, they can turn to mush; too thick, and they might not cook through by the time the Oat Topping is perfectly golden.
The most important thing is consistency. Try to make all your slices a similar thickness so they cook at the same rate. A good apple corer/slicer can be a time-saver here, but a sharp knife and steady hand work just as well.
Seasoning Your Apples: Beyond Just Sugar
While the apples will get some sweetness from their own sugars and any added sugar, a few extra touches can elevate the filling:
- Lemon Juice: A squeeze of fresh lemon juice not only brightens the flavor of the apples but also helps prevent them from browning as you prepare them.
- Spices: Cinnamon is a must, but a pinch of nutmeg, allspice, or cardamom can add wonderful warmth.
- A Thickener (Optional but Recommended): A tablespoon or two of cornstarch, flour, or tapioca starch tossed with the apples will help thicken their juices as they bake, preventing a watery filling and ensuring your Crumble Lover's Sheet-Pan Apple Crumble isn't soggy.
Step-by-Step Guide: Assembling Your Crumble Lover's Sheet-Pan Apple Crumble
Now for the fun part: bringing all the elements together to create your delicious Apple Dessert. This Sheet Pan Baking method is wonderfully straightforward.
Step 1: Preheat Your Oven and Prepare Your Sheet Pan
First things first, get your oven preheating to 375°F (190°C). Proper oven temperature is key for a crispy Oat Topping and perfectly cooked apples.
Next, prepare your sheet pan. A large, rimmed baking sheet (approximately 18×13 inches) is ideal. Line it with parchment paper for easy cleanup and to prevent sticking. This also helps in easily lifting the crumble out if needed.
Step 2: Prepare the Apple Filling
In a large bowl, combine your prepared apple slices (peeled or unpeeled, uniformly sliced) with your chosen sweeteners (like granulated sugar and brown sugar), spices (cinnamon, nutmeg), a squeeze of lemon juice, and a thickener like cornstarch.
Toss everything gently to ensure the apples are evenly coated. Spread the seasoned apple mixture in a single, even layer on your prepared sheet pan. Avoid piling them too high, as this can lead to steaming rather than baking.
Step 3: Mix Your Irresistible Oat Topping
In a separate medium bowl, combine the dry ingredients for your Oat Topping: rolled oats, all-purpose flour, brown sugar, granulated sugar, cinnamon, and a pinch of salt. Whisk them together.
Add your cold, cubed butter to the dry ingredients. Using a pastry blender, your fingertips, or two knives, cut the butter into the mixture until it resembles coarse crumbs with some larger, pea-sized pieces of butter remaining. This texture is vital for a crispy, tender topping on your Crumble Lover's Sheet-Pan Apple Crumble. If using nuts, stir them in now.
Step 4: Generously Apply the Oat Topping
Now for the best part: sprinkling that glorious Oat Topping over the apples. Distribute it evenly over the entire surface of the apple layer. Don't pack it down; a loose, generous layer will allow it to crisp up beautifully.
Remember, this is a Crumble Lover's recipe, so be generous! Ensure good coverage so every bite has that perfect balance of fruit and crumble.
Step 5: Bake to Golden Perfection
Place the sheet pan in the preheated oven. Bake for 30-40 minutes, or until the Oat Topping is deeply golden brown and crisp, and the apple filling is bubbling around the edges. You should be able to easily pierce the apples with a fork.
The exact baking time will depend on your oven and the thickness of your apple slices. Keep an eye on it during the last 10 minutes to prevent the topping from burning. If it starts to brown too quickly, you can loosely tent it with aluminum foil.
Tips and Tricks for Sheet Pan Baking Success
Making a Crumble Lover's Sheet-Pan Apple Crumble is easy, but a few extra tips can ensure your Apple Dessert is flawless every time. Success in Sheet Pan Baking often comes down to small details.
Choosing the Right Sheet Pan
Not all sheet pans are created equal. For best results, use a heavy-duty, light-colored aluminum baking sheet with rims. Darker pans can cause the bottom of your crumble to cook too quickly or even burn. The rims are essential to contain the apple juices.
A standard half-sheet pan (around 18×13 inches) is perfect for this recipe. Using a good quality pan promotes even heat distribution, which is crucial for a perfectly baked Oat Topping and tender apples.
Avoiding a Soggy Bottom: The Achilles' Heel of Crumbles
A soggy bottom can ruin an otherwise perfect apple crumble. Here are a few ways to prevent it:
- Use a Thickener: As mentioned earlier, tossing apples with cornstarch or flour helps absorb excess liquid.
- Don't Overcrowd: Ensure apples are in a relatively single layer. This allows moisture to evaporate.
- Adequate Topping: A generous Oat Topping acts as a barrier and absorbs some surface moisture from the fruit.
- Consider a Pre-Bake (for very juicy apples): If your apples are exceptionally juicy, you can partially bake them for 10-15 minutes before adding the topping. This is usually not necessary with this sheet pan method, though.
How to Know When Your Apple Crumble is Perfectly Baked
The visual and sensory cues are key:
- Topping: It should be a beautiful, deep golden brown and appear crisp.
- Filling: Look for bubbling juices around the edges of the pan. This indicates the sugar has caramelized and the filling is hot enough.
- Apples: Test with a fork or the tip of a knife; the apples should be tender and easily pierced.
- Aroma: Your kitchen should be filled with an irresistible aroma of baked apples and cinnamon!
Cooling and Serving Your Masterpiece
Once your Crumble Lover's Sheet-Pan Apple Crumble is baked, let it cool on the pan for at least 15-20 minutes before serving. This allows the filling to set up slightly, making it easier to serve and preventing a runny mess.
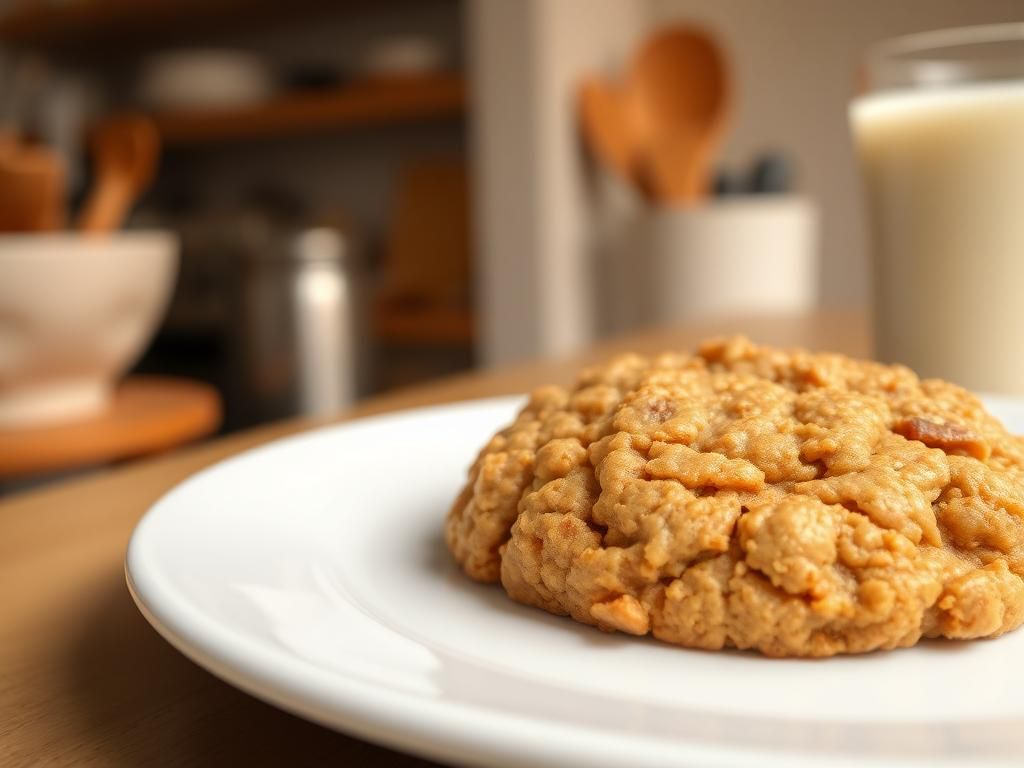
Serve warm, as is, or with a scoop of vanilla ice cream, a dollop of whipped cream, or a drizzle of heavy cream or custard. The contrast of warm crumble and cold ice cream is a classic for a reason!
Beyond the Basics: Customizing Your Sheet-Pan Apple Crumble
While this classic Crumble Lover's Sheet-Pan Apple Crumble is fantastic on its own, don't be afraid to get creative! The beauty of a recipe like this is its versatility. You can easily adapt the Oat Topping and fruit filling to suit your tastes or what you have on hand.
Adding Nuts and Seeds to Your Oat Topping
For an extra layer of crunch and flavor, incorporate chopped nuts or seeds into your Oat Topping.
- Pecans or Walnuts: These are classic additions, offering a buttery, rich crunch. Toast them lightly before adding for enhanced flavor.
- Sliced Almonds: Provide a delicate crispness.
- Pumpkin Seeds (Pepitas) or Sunflower Seeds: Great nut-free options that add a pleasant texture.
Simply mix about 1/2 cup of your chosen nuts or seeds into the dry topping ingredients before cutting in the butter.
Incorporating Other Fruits
Apples are wonderful, but this Sheet Pan Baking method and Oat Topping work beautifully with other fruits too:
- Pears: Use firm, ripe pears, perhaps mixed with apples.
- Berries: Add a cup of fresh or frozen (don't thaw) blueberries, raspberries, or blackberries to the apple mixture for a tart burst.
- Rhubarb: Combine with apples for a classic sweet-tart combination. You may need to increase the sugar slightly if using a lot of rhubarb.
- Peaches or Nectarines: Delicious in the summer months.
Adjust sugar levels and baking times as needed depending on the sweetness and moisture content of the fruits you choose.
Gluten-Free and Vegan Adaptations
It's easy to adapt this Crumble Lover's Sheet-Pan Apple Crumble for dietary restrictions:
- Gluten-Free: Use certified gluten-free rolled oats and a good quality gluten-free all-purpose flour blend in place of regular flour for the Oat Topping. Ensure your spices are also gluten-free.
- Vegan: Replace the dairy butter with a high-quality vegan butter substitute (stick form works best) or cold, firm coconut oil. Ensure your sugars are vegan-certified if that's a concern. The rest of the ingredients are typically vegan-friendly.
These simple swaps allow everyone to enjoy this delightful Apple Dessert.
Storing and Reheating Your Apple Dessert Delight
One of the best things about making a large Crumble Lover's Sheet-Pan Apple Crumble is the potential for leftovers. Stored and reheated properly, it can be just as delicious the next day.
How to Store Leftover Apple Crumble
Allow the apple crumble to cool completely to room temperature before storing. This prevents condensation from forming, which can make the Oat Topping soggy.
Once cooled, you can either cover the sheet pan tightly with plastic wrap or aluminum foil, or transfer the leftover crumble to an airtight container. Store it in the refrigerator for up to 3-4 days. For longer storage, you can freeze it for up to 3 months. Reputable sources like the FDA provide guidelines on refrigeration and food safety.
The Best Way to Reheat for That Just-Baked Taste
While you can microwave individual portions, it tends to make the Oat Topping soft rather than crispy. For the best results, reheat your apple crumble in the oven or a toaster oven:
- Preheat your oven or toaster oven to 350°F (175°C).
- Place the desired amount of crumble on an oven-safe dish or back on a baking sheet (if reheating a larger portion).
- Bake for 10-15 minutes, or until warmed through and the topping has regained some of its crispness.
This little bit of extra effort is well worth it to revive that delightful crunch of your Crumble Lover's Sheet-Pan Apple Crumble.
Frequently Asked Questions about 1
Here are some common questions we get about making the perfect Crumble Lover's Sheet-Pan Apple Crumble:
Can I make this apple crumble ahead of time?
Yes, you can! There are a couple of ways:
- Assemble and Chill: Prepare the apple filling and the Oat Topping separately. Store the filling in an airtight container in the fridge and the topping in a zip-top bag or airtight container (also in the fridge if it contains butter, or at room temp if making it much later without butter yet). Assemble just before baking. The topping can be made 2-3 days ahead. The apples can be prepped a day ahead if tossed with lemon juice.
- Bake Ahead: Bake the entire crumble, let it cool completely, cover, and refrigerate. Reheat as directed above before serving.
What's the best way to get a crispy oat topping?
Several factors contribute to a crispy Oat Topping:
- Use cold butter and don't overmix it into the dry ingredients.
- Use rolled oats instead of quick oats.
- Don't pack the topping down when you add it to the apples.
- Ensure your oven is at the correct temperature.
- A little brown sugar helps with crispness, as does not having an overly wet fruit filling.
Can I use different fruits with this oat topping recipe?
Absolutely! This Oat Topping is incredibly versatile. It's fantastic with peaches, berries, pears, rhubarb, or a mix of fruits. Adjust the sugar in the fruit filling based on the sweetness of the fruit you're using. You might also need to adjust baking time slightly depending on the fruit's moisture content. This truly is a base for many Sheet Pan Baking fruit desserts.
How do I prevent my sheet-pan apple crumble from getting soggy?
A soggy crumble is no fun! Key prevention tips include:
- Tossing your apples with a bit of cornstarch or flour to thicken the juices.
- Ensuring your apples are not overly wet when they go onto the pan.
- Not overcrowding the apples on the sheet pan, allowing moisture to evaporate.
- Making sure your Oat Topping is substantial and covers the fruit well.
- Letting the crumble cool for at least 15-20 minutes after baking helps the filling set.
Is it necessary to peel the apples for an apple crumble?
No, it's not strictly necessary. It comes down to personal preference. Leaving the skins on adds a bit of color, fiber, and a slightly more rustic texture to your Apple Dessert. If you prefer a smoother filling, then peeling is the way to go. If using unpeeled apples, be sure to wash them thoroughly.
Your Ultimate Apple Crumble Adventure Awaits
You're now equipped with all the knowledge and tips to create the most incredible Crumble Lover's Sheet-Pan Apple Crumble. This isn't just a recipe; it's an invitation to embrace the joy of easy, impressive baking, to celebrate the perfect harmony of tender fruit and an abundantly crisp Oat Topping, all thanks to the magic of Sheet Pan Baking.
So, gather your apples, get your oats ready, and prepare to fill your home with the comforting aroma of this sensational Apple Dessert. We promise, once you try making apple crumble this way, especially with that generous topping, you'll wonder how you ever made it any other way. Happy baking!