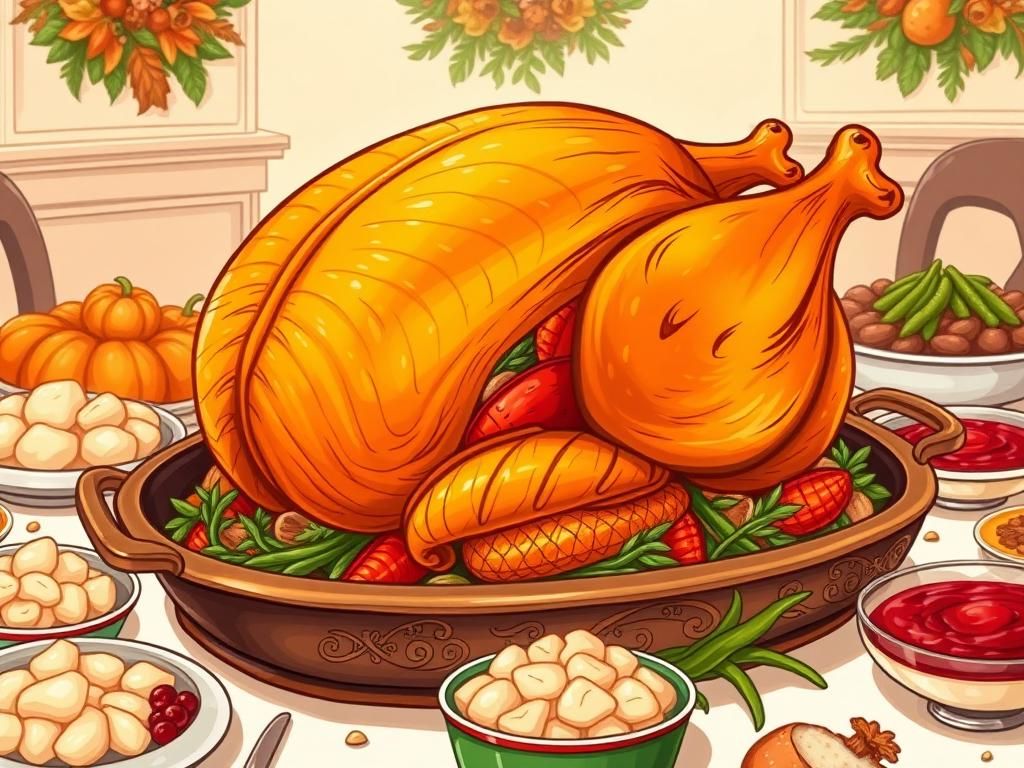
Are you dreaming of a Perfect Roast Turkey that takes center stage at your Thanksgiving or Holiday Main meal, boasting juicy meat and incredibly crispy skin? You're in the right place! This comprehensive Turkey Recipe guide moves beyond just steps; we're sharing three pivotal tips—focusing on proper preparation, smart roasting, and essential resting—to ensure your bird is succulent and flavorful. Forget past turkey disappointments; this year, you'll learn how to achieve a showstopper that will have everyone asking for seconds and your secret.
Table of Contents
- Why This Perfect Roast Turkey Recipe Will Be Your New Holiday Staple
- Gathering Your Ingredients and Tools for the Ultimate Turkey Recipe
- Step-by-Step Guide to Your Perfect Roast Turkey
- Beyond the Bird: Making the Most of Your Thanksgiving Main
- Common Turkey Troubles and Easy Solutions
- Frequently Asked Questions about Perfect Roast Turkey
- Elevating Your Holiday Main: Final Thoughts on Your Turkey Recipe Success
Why This Perfect Roast Turkey Recipe Will Be Your New Holiday Staple
The quest for the Perfect Roast Turkey can feel like a culinary Everest, especially when it's the centerpiece of a significant Holiday Main like Thanksgiving. Many home cooks approach it with a mix of excitement and trepidation, haunted by memories of dry meat or lackluster skin. But what if I told you that a truly magnificent turkey is within your reach, every single time? This isn't just another Turkey Recipe; it's a blueprint for success.
The Secret to a Succulent Bird: It's All in the Prep
The journey to a juicy, flavorful turkey begins long before it hits the oven. We're talking about techniques that infuse moisture and seasoning deep into the meat. Forget simply rubbing some butter on top and hoping for the best. Thoughtful preparation, which we'll delve into, is the cornerstone of a Perfect Roast Turkey. This upfront effort pays massive dividends in the final taste and texture.
Achieving That Golden-Brown, Crispy Skin
Let's be honest, that audible crackle of perfectly rendered, crispy turkey skin is a moment of pure joy. It's a hallmark of a expertly roasted bird. This recipe focuses on methods that not only ensure the meat is cooked beautifully but also that the skin transforms into a golden, irresistible treat. It’s about managing moisture on the skin's surface and using the oven's heat to your advantage.
Flavor That Penetrates Every Bite
A Perfect Roast Turkey isn't just about being moist; it's about being deeply flavorful. From the choice of aromatics to the seasoning strategy, every element is designed to build layers of taste. We’ll explore how to get your chosen flavors—be they classic herbs or more adventurous spices—to permeate beyond the surface, making every slice a delight. This ensures your Holiday Main is memorable for all the right reasons.
Gathering Your Ingredients and Tools for the Ultimate Turkey Recipe
Before you can embark on creating your Perfect Roast Turkey, a little organization goes a long way. Having the right ingredients and tools on hand makes the entire process smoother and more enjoyable. Let's break down what you'll need for this standout Turkey Recipe.
Choosing the Right Turkey: Size and Type Matters
The star of the show, obviously, is the turkey. When selecting your bird for this Holiday Main, consider a few things:
- Size: A good rule of thumb is 1 to 1.5 pounds of turkey per person. This accounts for bone weight and ensures some delicious leftovers. For a smaller gathering, a 10-12 pound turkey is ideal, while larger crowds might need a 18-20 pounder or even two smaller birds.
- Type:
- Fresh vs. Frozen: Fresh turkeys are convenient as they don't require lengthy thawing. Frozen turkeys are often more budget-friendly but need several days to thaw safely in the refrigerator. For safe thawing guidelines, the FDA offers comprehensive advice.
- Heritage vs. Conventional: Heritage breeds often boast a richer, more complex flavor but can be pricier and sometimes have a different meat-to-bone ratio. Conventional (Broad Breasted White) turkeys are widely available and what most recipes are designed for.
- Pre-brined or Self-basting: Be cautious if your turkey is labeled "enhanced" or "self-basting" as it may already contain a salt solution. If so, you'll want to skip or significantly reduce any additional brining.
Essential Aromatics and Seasonings
These are the supporting actors that elevate your Perfect Roast Turkey from good to great:
- For the Cavity: Onions, carrots, celery (the classic mirepoix), garlic cloves, fresh herbs like thyme, rosemary, and sage, and perhaps half a lemon or orange.
- For the Rub/Basting:
- Fat: Unsalted butter (softened), olive oil, or a combination.
- Seasonings: Kosher salt (crucial!), freshly ground black pepper, paprika (for color), garlic powder, onion powder.
- Fresh Herbs: Finely chopped thyme, rosemary, sage.
- For Brining (if you choose this path):
- Wet Brine: Kosher salt, sugar (optional, but aids browning), water, and aromatics like peppercorns, bay leaves, citrus peels.
- Dry Brine: Primarily kosher salt, perhaps a little sugar, and dried herbs.
Must-Have Kitchen Equipment
Having these tools will make your Turkey Recipe execution flawless:
- Large Roasting Pan with a Rack: The rack allows air to circulate for even cooking and crispy skin. A V-rack is excellent for turkeys.
- Reliable Meat Thermometer: This is non-negotiable for a Perfect Roast Turkey. An instant-read digital thermometer is best for checking various spots. An oven-safe probe thermometer that stays in the bird is also very helpful.
- Kitchen Twine: For trussing the legs, which helps with even cooking.
- Large Cutting Board: Preferably one with a juice groove for carving.
- Sharp Carving Knife and Fork: Essential for neat slices.
- Baster or Basting Brush: For applying juices or melted fat during roasting.
- Paper Towels: For patting the turkey thoroughly dry – key for crispy skin.
- Brining Container (if wet brining): A large food-grade bucket, stockpot, or brining bag.
Step-by-Step Guide to Your Perfect Roast Turkey
Now for the main event: transforming your chosen bird into the Perfect Roast Turkey that will grace your Thanksgiving table. Follow these steps, incorporating our key tips, for a magnificent Holiday Main.
Key Tip #1: The Magic of Brining (Wet vs. Dry)
Brining is a game-changer for ensuring a moist and flavorful turkey. It works through osmosis and diffusion, helping the meat retain moisture during cooking and seasoning it from within. You have two main options for this crucial step in your Turkey Recipe:
- Wet Brine: This involves submerging the turkey in a saltwater solution (typically around 1 cup of kosher salt to 1-2 gallons of water, often with sugar and aromatics) for 12-24 hours.
- Pros: Guarantees juiciness, seasons deeply.
- Cons: Requires significant refrigerator space, can sometimes make the skin less crispy if not dried thoroughly, and drippings can be very salty.
- Dry Brine (Salting): This involves rubbing the turkey generously with kosher salt (about 1 tablespoon per 4-5 pounds of turkey) and letting it rest in the refrigerator, uncovered or loosely covered, for 1-3 days.
- Pros: Results in incredibly flavorful meat, promotes very crispy skin as it draws out surface moisture, and requires less space. The drippings are also perfectly seasoned for gravy. Many culinary experts, like those at Serious Eats, often champion dry brining for its superior results.
- Cons: Needs a bit more planning time.
Our Recommendation for a Perfect Roast Turkey: Dry brining. The flavor penetration and skin crispiness are generally superior, and it's less cumbersome.
If Dry Brining:
- Remove giblets and neck from the turkey. Pat the turkey very dry with paper towels.
- Rub the kosher salt (and any other dry seasonings like pepper or a pinch of sugar) all over the turkey, including inside the cavity.
- Place the turkey on a rack set inside a baking sheet and refrigerate uncovered for at least 24 hours, and up to 72 hours. The longer it dry brines, the more seasoned the meat and drier (therefore crispier) the skin will be.
Preparing the Turkey for Roasting (Patting Dry, Seasoning, Aromatics)
Whether you brined or not, proper prep right before roasting is key:
- Remove from Fridge & Temper: Take the turkey out of the refrigerator about 1-2 hours before roasting to allow it to come closer to room temperature. This promotes more even cooking.
- Pat Extremely Dry: Use paper towels to pat the turkey skin completely dry, inside and out. This is critical for achieving crispy skin. If you wet brined, rinse the turkey thoroughly first, then pat dry.
- Stuff with Aromatics: Loosely fill the main cavity with your chosen aromatics: quartered onion, celery stalks, carrot chunks, garlic cloves, and sprigs of fresh thyme, rosemary, and sage. Don’t pack it too tightly, as this can hinder even cooking. Note: We recommend cooking stuffing/dressing separately for food safety and better texture.
- Season and Fatten:
- Gently loosen the skin over the breast and thighs. Spread softened butter (plain or herb-infused) underneath the skin. This bastes the meat directly.
- Rub the exterior of the turkey with more softened butter or olive oil.
- Season generously with freshly ground black pepper. If you didn't brine, season with salt as well. If you dry brined, you likely won't need much, if any, additional salt on the skin.
- Truss (Optional but Recommended): Tie the drumsticks together with kitchen twine. You can also tuck the wing tips under the bird to prevent them from burning.
Key Tip #2: Mastering Roasting Temperatures and Techniques
How you roast your turkey significantly impacts its final outcome. There isn't one single "right" temperature, but a common and effective approach for a Perfect Roast Turkey involves a combination:
- Initial High Heat Blast (Optional): Some cooks start at a higher temperature (e.g., 425-450°F / 220-230°C) for the first 30-45 minutes to kickstart browning and crisping the skin. Then, reduce the temperature for the remainder of the cook.
- Moderate Roasting Temperature: A consistent temperature of 325-350°F (163-177°C) is a reliable choice for cooking the turkey through without drying it out too quickly.
- Positioning: Place the turkey on the rack in your roasting pan. Add about 1-2 cups of water or chicken broth to the bottom of the pan to prevent drippings from scorching (you may need to replenish this).
- Tent if Necessary: If the skin, particularly the breast, starts to get too dark before the turkey is cooked through, loosely tent it with aluminum foil.
- Basting (Optional): Basting involves spooning pan juices over the turkey every 30-45 minutes.
- Pros: Can add some moisture and flavor to the surface.
- Cons: Every time you open the oven, the temperature drops, potentially extending cooking time. If you've brined and put butter under the skin, basting is often less critical for a juicy Holiday Main. If you do baste, do it quickly.
Estimated Roasting Times (at 325°F / 163°C): These are approximate. Always use a meat thermometer.
- 10-12 lbs: 3 to 3.5 hours
- 12-14 lbs: 3.5 to 4 hours
- 14-18 lbs: 4 to 4.5 hours
- 18-20 lbs: 4.5 to 5 hours
- 20-24 lbs: 5 to 5.5 hours
Checking for Doneness: The Importance of a Meat Thermometer
This is where many Thanksgiving turkey attempts go wrong. Relying on pop-up timers or wiggle tests is risky.
- Target Temperatures:
- Thighs: The thickest part of the thigh (avoiding bone) should register 170-175°F (77-79°C). Dark meat needs to cook to a higher temperature to be tender.
- Breast: The thickest part of the breast should register 160-165°F (71-74°C). The temperature will continue to rise during resting.
- How to Check: Insert your instant-read thermometer into the thickest part of the thigh, ensuring you don't hit bone. Then check the breast. If any part is undercooked, continue roasting, checking every 15-20 minutes.
Key Tip #3: The Crucial Resting Period – Don’t Skip This!
Once your turkey reaches the target temperatures, do not carve it immediately! This is perhaps the most vital step for a juicy Perfect Roast Turkey.
- Remove and Tent: Carefully transfer the turkey from the roasting pan to a clean cutting board. Tent it loosely with aluminum foil.
- Rest Time: Let the turkey rest for a minimum of 20-30 minutes for smaller birds, and up to 40-60 minutes for larger ones. During this time, the muscle fibers relax, and the juices redistribute throughout the meat. If you cut into it too soon, all those precious juices will run out onto the board, resulting in drier meat.
- Temperature Rise: The internal temperature will continue to rise by 5-10°F during resting (carryover cooking), ensuring it's perfectly cooked and safe.
This resting period is your golden opportunity to make gravy from the pan drippings!
Beyond the Bird: Making the Most of Your Thanksgiving Main
Your Perfect Roast Turkey is resting beautifully. Now what? Let's talk about enhancing your Holiday Main experience with fantastic gravy, expert carving, and ideas for those inevitable (and delicious) leftovers. This is where your Turkey Recipe truly shines.
Crafting a Flavorful Pan Gravy from Drippings
Those browned bits and flavorful fats left in the roasting pan are liquid gold! Don't let them go to waste.
- Deglaze: Pour off most of the excess fat from the roasting pan, leaving about 2-4 tablespoons of fat and all the browned bits (fond). Place the roasting pan over medium heat on your stovetop (you might need to use two burners).
- Make a Roux: Sprinkle an equal amount of all-purpose flour (2-4 tablespoons) into the fat and whisk constantly for 1-2 minutes until it forms a smooth paste and cooks slightly.
- Add Liquid: Gradually whisk in 2-4 cups of hot chicken or turkey broth (or the liquid from simmering the giblets and neck). Continue whisking to prevent lumps.
- Simmer and Season: Bring the gravy to a simmer, scraping up any browned bits from the bottom of the pan. Let it cook, whisking occasionally, until it thickens to your desired consistency (usually 5-10 minutes).
- Strain and Serve: Taste and adjust seasoning with salt and pepper. For an extra smooth gravy, strain it through a fine-mesh sieve. Serve hot with your Perfect Roast Turkey.
Carving Your Perfect Roast Turkey Like a Pro
Carving can seem daunting, but with a little know-how, you'll be serving beautiful slices.
- Remove Legs and Thighs: Cut through the skin connecting the leg to the breast. Pull the leg gently away from the body and cut through the thigh joint. Separate the drumstick from the thigh by cutting through that joint. Carve the thigh meat parallel to the bone.
- Remove Wings: Pull each wing away from the body and cut through the joint.
- Carve the Breast Meat:
- Method 1 (Slicing on the bone): Starting from the outer edge of one breast half, slice downwards towards the rib cage.
- Method 2 (Removing the breast half): Make a deep horizontal cut just above the wing joint, all the way to the bone. Then, starting at the breastbone (keel bone), make a vertical cut down along one side of the bone, angling your knife to follow the contour of the ribs, until the entire breast half comes off in one piece. Place it on the cutting board and slice against the grain. Repeat for the other side.
- Arrange and Serve: Arrange the carved meat attractively on a platter.
Creative Ways to Use Leftover Turkey
One of the best parts of a successful Thanksgiving or Holiday Main is the leftovers!
- Classic Turkey Sandwiches: With cranberry sauce and stuffing.
- Turkey Soup or Noodle Casserole: A comforting classic.
- Turkey Pot Pie: A hearty and delicious way to use up meat and leftover veggies.
- Turkey Tacos or Enchiladas: Give your leftovers a new flavor profile.
- Turkey Salad: Great for a light lunch.
Store leftover turkey in an airtight container in the refrigerator for 3-4 days, or freeze for longer storage.
Common Turkey Troubles and Easy Solutions
Even with the best Perfect Roast Turkey Recipe, occasional hiccups can happen. Here’s how to troubleshoot some common issues and keep your Holiday Main on track for success.
"My Turkey is Too Dry!" – Prevention and Fixes
This is the most feared turkey outcome.
- Prevention:
- Brine! As discussed, dry or wet brining makes a huge difference.
- Don't overcook. Use a reliable meat thermometer and pull the turkey when the breast hits 160-165°F (it will rise during resting). The thigh should be 170-175°F.
- Rest the turkey properly. This allows juices to redistribute.
- Butter under the skin. This bastes the breast meat.
- Fixes (if it's already a bit dry):
- Slice the turkey and serve it with plenty of gravy.
- If very dry, you can briefly simmer slices in warm chicken broth before serving (use this sparingly).
- Focus on using the drier meat in dishes where it's mixed with other moist ingredients, like soups or casseroles.
"The Skin Isn't Crispy!" – How to Achieve Crackling Perfection
Flabby skin is a disappointment.
- Prevention:
- Pat the turkey very dry with paper towels before seasoning and roasting. Moisture is the enemy of crispiness.
- Dry brining helps draw moisture from the skin.
- Avoid overcrowding the oven. Good air circulation is key.
- Don't tent too early or too tightly unless absolutely necessary to prevent burning. If you do tent, do it loosely.
- Consider a high-heat blast at the beginning or end of roasting (e.g., increase oven to 400-425°F for the last 15-20 minutes, watching carefully).
- Fixes (if it's cooked but skin is lackluster):
- If the turkey is fully cooked but the skin isn't crisp, you can try carefully broiling it for a very short time (1-3 minutes per side), watching it like a hawk to prevent burning. Remove sections as they crisp. This is risky, so proceed with caution.
"Help! My Turkey is Cooking Unevenly."
Sometimes one part of the turkey (often the breast) cooks faster than another (the thighs).
- Prevention:
- Trussing can help with more uniform cooking.
- Starting the turkey breast-down for the first hour can shield the breast meat, then flip it breast-up to brown. This can be tricky with a large, hot bird.
- Strategic foil tenting: If the breast is browning too quickly while the thighs still need time, tent only the breast area loosely with foil.
- Ice the breast (an advanced trick): Some chefs place an ice pack on the breast for about an hour before roasting to lower its initial temperature, allowing the thighs to catch up.
- Fixes:
- Use foil to shield the parts that are cooking too fast.
- If the breast is done but the thighs aren't, you can carefully carve off the breast meat, tent it to keep warm, and return the rest of the turkey to the oven to finish cooking the dark meat. This is a bit of surgery but can save the meal.
Remember, a good meat thermometer is your best friend in diagnosing and managing cooking evenness for your Perfect Roast Turkey.
Frequently Asked Questions about Perfect Roast Turkey
Here are answers to some common questions home cooks have when tackling this iconic Holiday Main using a Turkey Recipe.
How long should I roast my turkey per pound?
As a general guideline, at 325°F (163°C), plan for about 15-20 minutes per pound for an unstuffed turkey. However, always rely on a meat thermometer for accuracy, not just time. Factors like oven calibration, whether the bird was brined, and its starting temperature can all affect cook time. Aim for 160-165°F in the breast and 170-175°F in the thigh before resting for your Perfect Roast Turkey.
Should I stuff my turkey before roasting?
While traditional, most food safety experts, including the USDA, recommend cooking stuffing separately. Stuffing cooked inside a turkey can struggle to reach a safe internal temperature (165°F) without overcooking the bird. If it doesn't get hot enough, it can harbor harmful bacteria. Cooking stuffing in a separate casserole dish ensures it's cooked through and often results in better texture (crispier top!).
Can I prepare my turkey ahead of time?
Yes, several steps can be done in advance!
- Thawing: If frozen, this takes several days in the fridge.
- Brining: Dry brining can be done 1-3 days ahead. Wet brining is typically 12-24 hours.
- Aromatics & Herb Butter: Chop vegetables for the cavity and prepare herb butter a day or two before. Store them in airtight containers in the fridge.
On the day of roasting, you'll still need to bring the turkey to room temperature, stuff with aromatics (if using), and roast.
What's the best way to thaw a frozen turkey?
The safest method is in the refrigerator. Allow approximately 24 hours of thawing time for every 4-5 pounds of turkey. Place the wrapped turkey on a tray or in a pan to catch any drips. Never thaw a turkey at room temperature, as this can allow harmful bacteria to grow on the warmer, outer parts while the inside is still frozen. For faster (but more attention-intensive) thawing, you can use the cold water method, changing the water every 30 minutes.
How do I know when my Thanksgiving turkey is truly done?
The only foolproof way is with a meat thermometer. A Perfect Roast Turkey is done when:
- The thickest part of the thigh (not touching bone) registers 170-175°F (77-79°C).
- The thickest part of the breast registers 160-165°F (71-74°C).
The temperature will rise another 5-10 degrees during the crucial resting period. Juices from the thigh should run clear when pierced, but a thermometer is more reliable.
Can I use a convection oven for my turkey recipe?
Yes, you can! Convection ovens circulate hot air, which can lead to faster cooking and crispier skin. If using a convection setting, typically you'll either reduce the oven temperature by about 25°F (15°C) from what the standard Turkey Recipe calls for, or reduce the cooking time by about 25-30%. Monitor closely with a meat thermometer, as it will likely cook faster.
Elevating Your Holiday Main: Final Thoughts on Your Turkey Recipe Success
Congratulations! By focusing on smart preparation like brining, mastering your roasting temperatures, and—above all—allowing for that essential resting period, you're now equipped to create a truly Perfect Roast Turkey. This isn't just about following a Turkey Recipe; it's about understanding the techniques that transform a simple bird into a magnificent Holiday Main.
Imagine the satisfaction as you present a beautifully browned, incredibly juicy, and flavorful turkey at your Thanksgiving table. The "oohs" and "aahs," the quiet appreciation as everyone takes their first bite – that's the reward. Remember, practice and attention to detail make all the difference. Embrace the process, trust your thermometer, and enjoy crafting a holiday centerpiece that will be remembered long after the last slice is savored. Happy roasting!